Here is a step by step guide which introduces an easy and fast way to play WAV on iPhone, WAV on iPod, and WAV on iPad from iTunes.With the popularity of Apple iPhone, iPad, and iPod, most Apple fans and audiophiles like to listen to the high-quality music on the loved Apple device and iTunes, thus we always need to download and import other music to iTunes. Can iTunes play WAV files? WAV is an audio file format that was developed by Microsoft, which is so wide spread today that it is called a standard PC audio file format. And iTunes supports five different audio formats. You can see them by choosing iTunes > Preferences, clicking the General tab, then clicking Import Settings. iTunes now can read, write and convert between MP3, AIFF, WAV, MPEG-4, AAC and Apple Lossless (.m4a). Though iTunes announced to support WAV audio file, you will be disappointed when adding WAV to iTunes, and and you may find the web is swarmed with similar queries like "Why iTunes won't play WAV somtimetimes" or "How to add WAV to iTunes". Continue reading this article you will get two effective solutions to convert WAV audio to iTunes for sycing/playing as below. Solution 1 - Use a third-party video converterIf you want to import WAV to iTunes with the quality of WAV audio intact, you can convert WAV to Apple's friendly lossless m4a. If you prefer to smaller file size rather than quality, you can convert WAV to a more common format like MP3 to gain more compression rate and smaller file size. Whether you want to convert WAV to M4A or MP3, Dimo Video Converter Ultimate for Mac can help you do the job. Key Features of the Utility:* Convert iTunes unrecognized WAV to M4A, AIFF, AAC, WAV, MP3, etc to help you open WAV in iTunes (12.5.5);* It supports converting many uncommon audio formats in order to help other Apple users to play them in iTunes, QuickTime, iPhone, iPad, iPod, Final Cut Pro, etc;* In addition to WAV, it enables you convert iTunes and other Apple devices and players incompatible OPUS, AC3, OGG, OGA, WMA, XWM, 3GA, M4A, M4B, MKA, RA, RAM, APE, AU, AUD, AIFC, CAF, MPC, QCP, VOC, VOX, GSM, etc or video files like WMV, AVI, MP4, MKV to MP3, AIFF, WAV, etc for playback;* Besides working as a super helper for Apple users, it also allows you to convert audio files so that you can play them in Android, BlackBerry, Xbox serious, PlayStation serious and so on;* You can optimize WAV and other audio files before converting them or importing them into popular devices and players with built-in audio editing tools.* For Windows PC users, here is the windows version which is compatible with Windows 10/8.1/8/7/Vista/XPFree Download Dimo Video Converter Ultimate for Mac/Win:
 Other Download:
Step by Step Guide on How to Convert and Import WAV to iTunesStep 1 Add WAV filesAfter downloading, you can install and run the WAV to iTunes Converter. To load WAV files to this app, you can go to "Add File" from the main menu to browse your hard disk to select the WAV audio files. Also, you can directly drag one or several WAV files to the software, it won't take you too long until. If you want to be more cautious, you can always make a duplicate folder of your master copies. It is always a good practice to have a back-up.
Other Download:
Step by Step Guide on How to Convert and Import WAV to iTunesStep 1 Add WAV filesAfter downloading, you can install and run the WAV to iTunes Converter. To load WAV files to this app, you can go to "Add File" from the main menu to browse your hard disk to select the WAV audio files. Also, you can directly drag one or several WAV files to the software, it won't take you too long until. If you want to be more cautious, you can always make a duplicate folder of your master copies. It is always a good practice to have a back-up.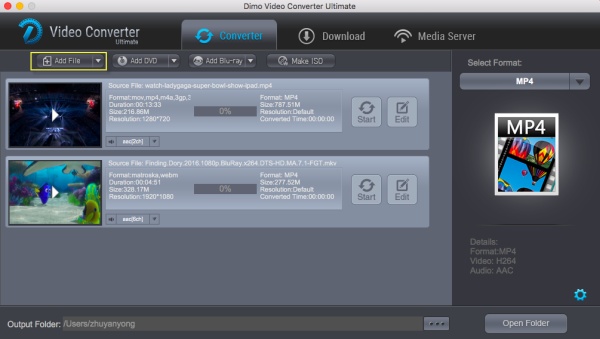 Step 2 Set output formatClick "Select Format" drop-down button to choose "MP3", "AIFF" or etc as output formats from "Format > Audio" category. If you care about the quality of the output file, just choose "WAV" or "M4A" as output format from "Format > Audio" category. An MP3 tends to offer a higher room of flexibility in the situation that you might want to share those audios with family or friends that happen to use non-Apple devices, whereas an M4A might still be subjected to the DRM.At this time, you can also set output directory, so you can get the output files as soon as the conversion is finished. To do this, you need to click "..." of the program window to specify the output folder.Step 3 Edit before converting WAV files to iTunes (Optional)Simply skip this step if you don't want to edit your audio files. Or else, click on the "Edit" button on the right-hand side of the uploaded audio file to access the editing screen.Step 4 Modify Audio Parameters (Optional)Before starting conversion, advanced users are allowed to modify audio parameters. Open Settings Window, you can change audio bitrate, encoder, audio channel and sample rate.
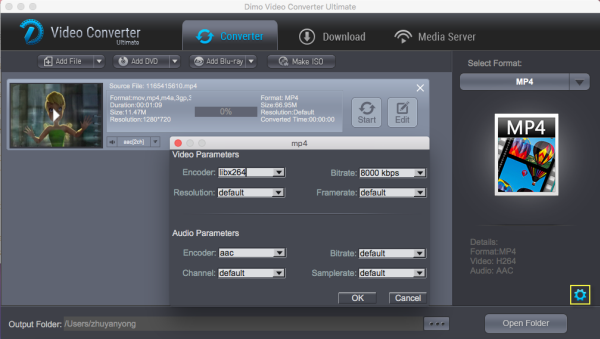 Step 5 End the conversionIn the end, just click the conspicuous "Start" button to perform WAV iTunes conversion efficiently on Mac/Windows PC. The process will take you some time, which mainly depends on the size of all imported WAV files and the performance of your computer.Now, you can really play WAV on iTunes, just drag and drop the output files (.mp3 files) from the output folder to iTunes music library. You can also sync WAV to iPhone 7 Plus, iPhone 7, iPhone 6S/6S Plus/6/6 Plus/SE/5S/5C, iPad Air 2, iPad Mini 4/3, iPod Touch 6, etc. via iTunes. In this way, you'll find you can import the WAV files to iTunes library and even sync to Apple devices without any limitation.Tip: For new iTunes 12.5.5, there's little difference with the previous version. You can learn how to add audio files to iTunes in detail.1. Start iTunes 12.5.5.2. Click File > Add File to Library.3. Click View and select Music, then your music library will be presented.4. Click Songs and now you can find your transferred MP3 audio. In this interface, you can also directly drag and drop local audio files.The following is a step by step guide that tells you how to transfer the converted WAV file into Apple TV via iTunes.Step 1 Import the converted WAV files into iTunes.Step 2 Make your Apple TV discoverable by your iTunes on computer. Go to your Apple TV to open "Settings" -> "Computers"- > "Connect to iTunes".Step 3 Find your Apple TV in iTunes. Open iTunes on your computer, go to menu -> "Preferences", click "Apple TV" and make sure "Look for Apple TVs" is selected. Close Preferences window.Step 4 Now, you will see your Apple TV in the main window. Select it and enter the passcode.Step 5 In the last step, go to "Summary" and select "Automatic Sync" or "Custom Sync" to finish transferring WAV to Apple TV.Solution 2– Use iTunesIn iTunes music library, iTunes could create a copy of a song in a new format, with the original file existing in original format. Also, it could import external songs and convert them to a new format at the same time, which creates a converted copy of file in iTunes music library.* Convert formats for songs inside iTunes:1. Open iTunes Preferences. Windows: Choose Edit > Preferences. Mac: Choose iTunes > Preferences.2. Click "General > Importing Settings…" button to invoke the "Importing Settings" window, on which click the "Import Using" drop-down button to choose the encoding format you want to convert the song to (e.g. select WAV Encoder if you want to convert iTunes songs to WAV format). Then click OK button.3. Select one or more songs in iTunes music library, then from the File > Create New Version menu, choose the versions you want to get (the menu item changes to show what's selected in your Importing preferences).* Convert external songs to iTunes via importing:To convert all the songs in a folder or on a disk to iTunes, hold down the Option key (Mac) or Shift key (Windows) and choose "File > Create New Version > Convert [import preference setting]". The Import preference setting will match what you chose in step 2 mentioned above. iTunes will prompt you for the location of the folder or disk you want to import and convert. All the songs in the folder or on the disk will be converted.Free Download or Purchase Dimo Video Converter Ultimate for Mac/Win:
 Need the lifetime version to work on 2-4 Macs so that your friends and family can instantly broaden their entertainment options? Please refer to the family license here.
  Kindly Note:The price of Dimo Video Converter Ultimate for Mac is divided into 1 Year Subscription, Lifetime/Family/Business License: $43.95/Year; $45.95/lifetime license; $95.95/family license(2-4 Macs); $189.95/business pack(5-8 Macs). Get your needed one at purchase page.Related Software:BDmate (Mac/Win)Lossless backup Blu-ray to MKV with all audio and subtitle tracks; Rip Blu-ray to multi-track MP4; Convert Blu-ray to almost all popular video/audio formats and devices; Copy Blu-ray to ISO/M2TS; Share digitized Blu-ray wirelessly.DVDmate (Mac/Win)A professional DVD ripping and editing tool with strong ability to remove DVD protection, transcode DVD to any video and audio format, and edit DVD to create personal movie.Videomate (Mac/Win)An all-around video converter software program that enables you to convert various video and audio files to formats that are supported by most multimedia devices.8K Player (Mac/Win)A mixture of free HD/4K video player, music player, Blu-ray/DVD player, video recorder and gif maker. Contact us or leave a message at Facebook if you have any issues.Related Articles:
Source: How to Import and Play WAV on iTunes?
Kindly Note:The price of Dimo Video Converter Ultimate for Mac is divided into 1 Year Subscription, Lifetime/Family/Business License: $43.95/Year; $45.95/lifetime license; $95.95/family license(2-4 Macs); $189.95/business pack(5-8 Macs). Get your needed one at purchase page.Related Software:BDmate (Mac/Win)Lossless backup Blu-ray to MKV with all audio and subtitle tracks; Rip Blu-ray to multi-track MP4; Convert Blu-ray to almost all popular video/audio formats and devices; Copy Blu-ray to ISO/M2TS; Share digitized Blu-ray wirelessly.DVDmate (Mac/Win)A professional DVD ripping and editing tool with strong ability to remove DVD protection, transcode DVD to any video and audio format, and edit DVD to create personal movie.Videomate (Mac/Win)An all-around video converter software program that enables you to convert various video and audio files to formats that are supported by most multimedia devices.8K Player (Mac/Win)A mixture of free HD/4K video player, music player, Blu-ray/DVD player, video recorder and gif maker. Contact us or leave a message at Facebook if you have any issues.Related Articles:
Source: How to Import and Play WAV on iTunes?
The article shows you an easy way to put and rip DVD movies onto your Amazon Cloud for sharing and streaming with ease.After 2012 Skyfall, Spectre creates another box office success (up to $900 million worldwide) and embraces overall possitive reviews. With the DVD version of Spectre 007 being new released, you have one more option to watch this fantastic action movie-watch Spectre 007 DVD movie. To share your Spectre DVD disc with all your family and friends, you can make full use of Amazon Drive cloud storage and make a digital copy of Spectre DVD onto Amazon Cloud so as the Spectre 007 DVD movie can be transferred to iPhone iPad Android, TV for unlimited movie experience. So how to upload Spectre DVD to Amazon Cloud? Searching high and low, I know that it's easy to do it as long as got a DVD Ripper in hand. Dimo Video Converter Ultimate for Mac is highly recommended here to fulfill your needs. It can professionally convert DVD to Amazon Cloud compatible MP4, MOV, AVI, WMV, FLV files with fast speed and excellent output quality on Mac (OS Sierra). In addition, this DVD Ripping software can also rip DVD to optimized video for playback on iPad, iPod, iPhone, Xbox, PS3, PS4, TV, VR, Android, FCP and more. With a built-in video editor, you are able to change the DVD movies according to your taste- add watermarks, rotate, crop, change video visual effects and even trim the long videos into multiple segments with short duration. The most important is that, it allows you to modify the video bitrate, frame rate, video size, audio channel, etc for your original large video clips for easier uploading. If you are a Windows user, please turn to Dimo Video Converter Ultimate to convert and upload DVD to Amazon Cloud on Windows PC (including Windows 10). Now download the right version of the program and follow the guide below.Free Download Dimo Video Converter Ultimate for Mac/Win: Other Download:
Guides about ripping Spectre DVD for uploading to Amazon CloudStep 1. Load Spectre DVD moviesInsert the Spectre DVD disc into your computer's DVD drive and run DVD Ripper. You can load the DVD movies by clicking "Add DVD" button on the top left. This DVD converter also supports ripping ISO and Video_ts folder.Tip: If you need to backupSpectre DVD with wanted audio track, you can click the drop down menu after "Audio" to select your desired tracks.
So how to upload Spectre DVD to Amazon Cloud? Searching high and low, I know that it's easy to do it as long as got a DVD Ripper in hand. Dimo Video Converter Ultimate for Mac is highly recommended here to fulfill your needs. It can professionally convert DVD to Amazon Cloud compatible MP4, MOV, AVI, WMV, FLV files with fast speed and excellent output quality on Mac (OS Sierra). In addition, this DVD Ripping software can also rip DVD to optimized video for playback on iPad, iPod, iPhone, Xbox, PS3, PS4, TV, VR, Android, FCP and more. With a built-in video editor, you are able to change the DVD movies according to your taste- add watermarks, rotate, crop, change video visual effects and even trim the long videos into multiple segments with short duration. The most important is that, it allows you to modify the video bitrate, frame rate, video size, audio channel, etc for your original large video clips for easier uploading. If you are a Windows user, please turn to Dimo Video Converter Ultimate to convert and upload DVD to Amazon Cloud on Windows PC (including Windows 10). Now download the right version of the program and follow the guide below.Free Download Dimo Video Converter Ultimate for Mac/Win: Other Download:
Guides about ripping Spectre DVD for uploading to Amazon CloudStep 1. Load Spectre DVD moviesInsert the Spectre DVD disc into your computer's DVD drive and run DVD Ripper. You can load the DVD movies by clicking "Add DVD" button on the top left. This DVD converter also supports ripping ISO and Video_ts folder.Tip: If you need to backupSpectre DVD with wanted audio track, you can click the drop down menu after "Audio" to select your desired tracks.  Step 2. Choose output formatClick "Select Format" bar and select the appropriate format. Since Amazon Cloud supports MP4, Quicktime, AVI, MTS, MPG, ASF, WMV, Flash, and OGG video/audio files, just select the one you need as the output format from "Format > Video" or "Format > HD Video" category. Or depends on your device, you can choose a suitable video format from "Device".Step 3. Advanced profile settingsSimply click Settings bar and you can tweak the settings to your satisfaction and even save it as preset. Please remember the file size is based more on bitrate than resolution which means bitrate higher results in bigger file size, and lower visible quality loss.
 Step 4. Edit/Split Spectre DVD movieClick Edit button and you can trim, crop or adjust the video with the built-in video editor to get the very part and effect of the movie you want.Tip: Keep in mind that Amazon Drive streaming is not available for videos longer than 20 minutes or larger than 2 GB, but these can be stored in Amazon Drive for you to download and watch offline. (See Amazon Drive Photos & Videos File Requirements)Step 4. Start rippingSpectre DVD to Amazon CloudAfter the above three steps, go back to the main interface and click the "Start" button to begin convertingSpectre DVD movies to Amazon Cloud highly compatible video files. Just copy the converted file to Amazon Cloud after the conversion process is complete. Enjoy.Note: Some file names are not compatible with Amazon Drive. If your file name contains incompatible characters, you will need to rename it before you can upload it.To upload photos and personal videos from your computer to Cloud Drive:1. Go to Amazon Cloud Drive.2. Click the Photos & Videos tab in the top navigation bar.3. Drag and drop files into the browser window, or click Upload and follow the onscreen instructions.Tip: After clicking Upload, you can use the Select Photos and Videos button to choose multiple files to upload. Uploading folders is not currently available within the Cloud Drive website.Your uploaded photos and personal videos are automatically available on the Cloud Drive Photos & Videos website, and are accessible from PC and Mac computers through a web browser. Choose to open and play the video using the Amazon Cloud player. Free Download or Purchase Dimo Video Converter Ultimate for Mac: Contact us or leave a message at Facebook if you have any issues.Related Articles:
Source: How can I Upload Spectre DVD to Amazon Cloud
Step 4. Edit/Split Spectre DVD movieClick Edit button and you can trim, crop or adjust the video with the built-in video editor to get the very part and effect of the movie you want.Tip: Keep in mind that Amazon Drive streaming is not available for videos longer than 20 minutes or larger than 2 GB, but these can be stored in Amazon Drive for you to download and watch offline. (See Amazon Drive Photos & Videos File Requirements)Step 4. Start rippingSpectre DVD to Amazon CloudAfter the above three steps, go back to the main interface and click the "Start" button to begin convertingSpectre DVD movies to Amazon Cloud highly compatible video files. Just copy the converted file to Amazon Cloud after the conversion process is complete. Enjoy.Note: Some file names are not compatible with Amazon Drive. If your file name contains incompatible characters, you will need to rename it before you can upload it.To upload photos and personal videos from your computer to Cloud Drive:1. Go to Amazon Cloud Drive.2. Click the Photos & Videos tab in the top navigation bar.3. Drag and drop files into the browser window, or click Upload and follow the onscreen instructions.Tip: After clicking Upload, you can use the Select Photos and Videos button to choose multiple files to upload. Uploading folders is not currently available within the Cloud Drive website.Your uploaded photos and personal videos are automatically available on the Cloud Drive Photos & Videos website, and are accessible from PC and Mac computers through a web browser. Choose to open and play the video using the Amazon Cloud player. Free Download or Purchase Dimo Video Converter Ultimate for Mac: Contact us or leave a message at Facebook if you have any issues.Related Articles:
Source: How can I Upload Spectre DVD to Amazon Cloud
How do you play, edit or upload Yuneec Typhoon H 4K videos? Here is a tutorial on how to downsize Typhoon H 4K to 1080p for further working on your Mac/PC.The Typhoon H from YUNEEC hexacopter features the GCO3+ gimbal-stabilized, 4K camera with 12MP stills mode, making it a great choice for aerial imaging of all types. However, when you try to play the Typhoon-H output 4K files on PC, iPhone, iPad, media devices or edit the 4K videos in NLEs including Final Cut Pro, Adobe Premiere Pro, Avid Media Composer, iMovie, etc, you find it's not an easy task…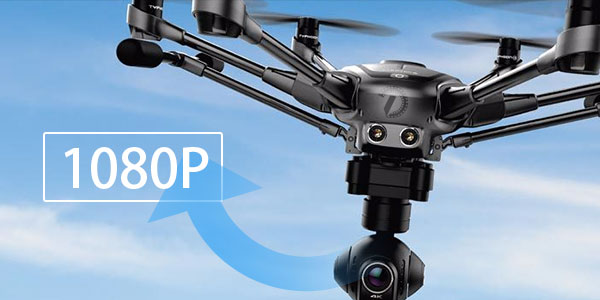 For those who wanna play and edit Typhoon-H 4K videos on old computer(editing a 4K video requires more computing power and it could be more time consuming), we suggest you to convert/downscale 4K to 1080p then edit the project in 1080p and smart-render. Although there are numbered video converter tools and utilities can convert and compress the ultra HD videos, few of them can process at a fast speed. Well, Dimo Video Converter Ultimate for Mac is considered to be the best 4K to HD video converter.It is surely in the support of compressing Typhoon-H 4K videos to 1080p faultlessly. What's more, this video app can help you to convert 4K MOV/MP4 from Typhoon-H to FCP/Adobe Premiere/After Effects/Avid MC/Davinci Resolve, iMovie, YouTube/VLC compatible format like Apple ProRes, MPEG-2, DNxHD, Apple InterMediate Codec, H.264, etc. Thanks to the built-in video editor, you can trim, crop and retouch your videos in clicks. Overall, this program is a completely professional 4K HD video converter, player and editor. What's more, this Ultra HD Video Converter is also available to customize the output resolutions to any size the users want. For Windows users, Dimo Video Converter Ultimate is the alternative choice. Download it and learn how to.Free Download Dimo Video Converter Ultimate for Mac/Win: Other Download:
Guide: How to downscale/convert Typhoon-H Ultra HD 4K to 1080pStep 1. Load Typhoon-H 4K VideoLaunch the 4K to 1080p Converter for Mac from Dimo; click "Add File" and load your 4K files from Typhoon-H or hard drive.Step 2. Select output formatNow select a proper format as the output format from the drop-down-list of "Select Format". There are MP4, MOV, AVI, WMV, etc. available for your choice. If you want to convert Typhoon-H 4K footage to editing in Final Cut Pro, Premiere Pro, Avid or iMovie, there are professional encoders like ProRes, MPEG-2, DNxHD, Apple Intermediate Codec, etc. in the "Editor" category. Here we take "Format > Video" > "MP4" as example. After selecting the output format, you can choose an output path as the destination folder to save the converted 1080p MP4 movie.Step 3. Set 1080p resolutionClick "Settings" button to customize these settings. Please set the "Resolution" as 1920*1080. Meanwhile, other parameters can be adjusted according to your own requirements.Step 4. Start 4K to 1080p conversionHit "Start" button to let the Typhoon-H 4K to 1080p conversion begin. When the conversion finished, check the generated 1080p video, you will certainly be satisfied with its final video quality. It would be much easier for you to playback and edit.Free Download or Purchase Dimo Video Converter Ultimate for Mac/Win: Need the lifetime version to work on 2-4 Macs so that your friends and family can instantly broaden their entertainment options? Please refer to the family license here. Kindly Note:The price of Dimo Video Converter Ultimate for Mac is divided into 1 Year Subscription, Lifetime/Family/Business License: $43.95/Year; $45.95/lifetime license; $95.95/family license(2-4 Macs); $189.95/business pack(5-8 Macs). Get your needed one at purchase page.Related Software:BDmate (Mac/Win)Lossless backup Blu-ray to MKV with all audio and subtitle tracks; Rip Blu-ray to multi-track MP4; Convert Blu-ray to almost all popular video/audio formats and devices; Copy Blu-ray to ISO/M2TS; Share digitized Blu-ray wirelessly.DVDmate (Mac/Win)A professional DVD ripping and editing tool with strong ability to remove DVD protection, transcode DVD to any video and audio format, and edit DVD to create personal movie.Videomate (Mac/Win)An all-around video converter software program that enables you to convert various video and audio files to formats that are supported by most multimedia devices.8K Player (Mac/Win)A mixture of free HD/4K video player, music player, Blu-ray/DVD player, video recorder and gif maker. Contact us or leave a message at Facebook if you have any issues.Related Articles:
Source: Downscaling Yuneec Typhoon H 4K to 1080p Playing
For those who wanna play and edit Typhoon-H 4K videos on old computer(editing a 4K video requires more computing power and it could be more time consuming), we suggest you to convert/downscale 4K to 1080p then edit the project in 1080p and smart-render. Although there are numbered video converter tools and utilities can convert and compress the ultra HD videos, few of them can process at a fast speed. Well, Dimo Video Converter Ultimate for Mac is considered to be the best 4K to HD video converter.It is surely in the support of compressing Typhoon-H 4K videos to 1080p faultlessly. What's more, this video app can help you to convert 4K MOV/MP4 from Typhoon-H to FCP/Adobe Premiere/After Effects/Avid MC/Davinci Resolve, iMovie, YouTube/VLC compatible format like Apple ProRes, MPEG-2, DNxHD, Apple InterMediate Codec, H.264, etc. Thanks to the built-in video editor, you can trim, crop and retouch your videos in clicks. Overall, this program is a completely professional 4K HD video converter, player and editor. What's more, this Ultra HD Video Converter is also available to customize the output resolutions to any size the users want. For Windows users, Dimo Video Converter Ultimate is the alternative choice. Download it and learn how to.Free Download Dimo Video Converter Ultimate for Mac/Win: Other Download:
Guide: How to downscale/convert Typhoon-H Ultra HD 4K to 1080pStep 1. Load Typhoon-H 4K VideoLaunch the 4K to 1080p Converter for Mac from Dimo; click "Add File" and load your 4K files from Typhoon-H or hard drive.Step 2. Select output formatNow select a proper format as the output format from the drop-down-list of "Select Format". There are MP4, MOV, AVI, WMV, etc. available for your choice. If you want to convert Typhoon-H 4K footage to editing in Final Cut Pro, Premiere Pro, Avid or iMovie, there are professional encoders like ProRes, MPEG-2, DNxHD, Apple Intermediate Codec, etc. in the "Editor" category. Here we take "Format > Video" > "MP4" as example. After selecting the output format, you can choose an output path as the destination folder to save the converted 1080p MP4 movie.Step 3. Set 1080p resolutionClick "Settings" button to customize these settings. Please set the "Resolution" as 1920*1080. Meanwhile, other parameters can be adjusted according to your own requirements.Step 4. Start 4K to 1080p conversionHit "Start" button to let the Typhoon-H 4K to 1080p conversion begin. When the conversion finished, check the generated 1080p video, you will certainly be satisfied with its final video quality. It would be much easier for you to playback and edit.Free Download or Purchase Dimo Video Converter Ultimate for Mac/Win: Need the lifetime version to work on 2-4 Macs so that your friends and family can instantly broaden their entertainment options? Please refer to the family license here. Kindly Note:The price of Dimo Video Converter Ultimate for Mac is divided into 1 Year Subscription, Lifetime/Family/Business License: $43.95/Year; $45.95/lifetime license; $95.95/family license(2-4 Macs); $189.95/business pack(5-8 Macs). Get your needed one at purchase page.Related Software:BDmate (Mac/Win)Lossless backup Blu-ray to MKV with all audio and subtitle tracks; Rip Blu-ray to multi-track MP4; Convert Blu-ray to almost all popular video/audio formats and devices; Copy Blu-ray to ISO/M2TS; Share digitized Blu-ray wirelessly.DVDmate (Mac/Win)A professional DVD ripping and editing tool with strong ability to remove DVD protection, transcode DVD to any video and audio format, and edit DVD to create personal movie.Videomate (Mac/Win)An all-around video converter software program that enables you to convert various video and audio files to formats that are supported by most multimedia devices.8K Player (Mac/Win)A mixture of free HD/4K video player, music player, Blu-ray/DVD player, video recorder and gif maker. Contact us or leave a message at Facebook if you have any issues.Related Articles:
Source: Downscaling Yuneec Typhoon H 4K to 1080p Playing
Wanna encode MKVCinemas downloaded MKV to MP4? While stay on the page, you will get a good MKV to MP4 converter to convert video from MKV to MP4 with ease.MKVCinemas is one of torrent movie sites where you can find and download MKV movies, videos and songs of Bollywood, Hollywood, Hindi, Cartoon, Animation, TV Shows. MKV is a popular container format for movies due to its greatest feature of it accommodate many different types of encoded video, audio and subtitle streams in different languages, which conveys Hollywood, Bollywood movies in high quality. However, MKV isn't exactly widely supported by most multimedia applications and household portable media devices like iTunes, iPhone, iPad, iPod, PS3, PS4, etc. because of the compatibility issues. That's way we will put together a guide on how to quickly convert MKVCinemas downloaded MKV files into MP4 format- best option to play on modern devices and media players.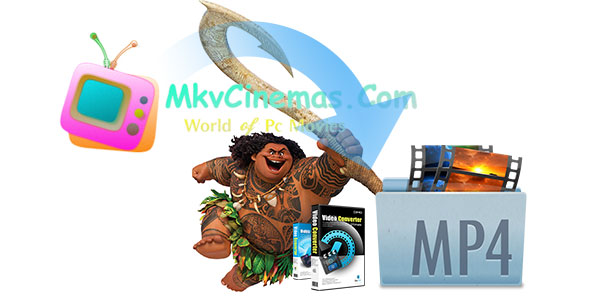 No matter what the situation is, you will be involving in MKV to MP4 file conversion. Dimo Video Converter Ultimate is our favorite to handle those MKV video files in 720p, 1080p or even 2160p. It is lightweight and easy-to-use that lets you convert almost every multimedia format you've ever heard including MKV, MP4, MOV, VOB, Tivo, FLV, MXF, MTS, XAVC, AVI, etc. You can convert MKV to h.264 MP4 file or MKV to MPEG-4 video on Windows 10 or vice versa. The equivalent Mac version - Dimo Video Converter Ultimate for Mac is also available for Mac user. Do note that the Windows version has NVDIA CUDA support which enables you to easily finisth MKV to MP4 conversion in 6X faster speed. OK, let's take a look at how easy is to convert your MKV video files downloded from MKVCinemas. In this article, we will take converting an .MKV to an .mp4 file on Windows PC for example. The process on Mac is pretty much identical to the one described below for Windows. Let's get started.Free Download Dimo Video Converter Ultimate (Win/Mac): Other Download:
Guide to Convert MKVCinemas downloaded MKV to MP4Step 1. Add MKVCinemas downloaded video files to the converter You can click "Add File" button to add MKVCinemas downloaded video files from computer folder or just drag & drop your MKVCinemas downloaded videos to the file list directly.
No matter what the situation is, you will be involving in MKV to MP4 file conversion. Dimo Video Converter Ultimate is our favorite to handle those MKV video files in 720p, 1080p or even 2160p. It is lightweight and easy-to-use that lets you convert almost every multimedia format you've ever heard including MKV, MP4, MOV, VOB, Tivo, FLV, MXF, MTS, XAVC, AVI, etc. You can convert MKV to h.264 MP4 file or MKV to MPEG-4 video on Windows 10 or vice versa. The equivalent Mac version - Dimo Video Converter Ultimate for Mac is also available for Mac user. Do note that the Windows version has NVDIA CUDA support which enables you to easily finisth MKV to MP4 conversion in 6X faster speed. OK, let's take a look at how easy is to convert your MKV video files downloded from MKVCinemas. In this article, we will take converting an .MKV to an .mp4 file on Windows PC for example. The process on Mac is pretty much identical to the one described below for Windows. Let's get started.Free Download Dimo Video Converter Ultimate (Win/Mac): Other Download:
Guide to Convert MKVCinemas downloaded MKV to MP4Step 1. Add MKVCinemas downloaded video files to the converter You can click "Add File" button to add MKVCinemas downloaded video files from computer folder or just drag & drop your MKVCinemas downloaded videos to the file list directly. 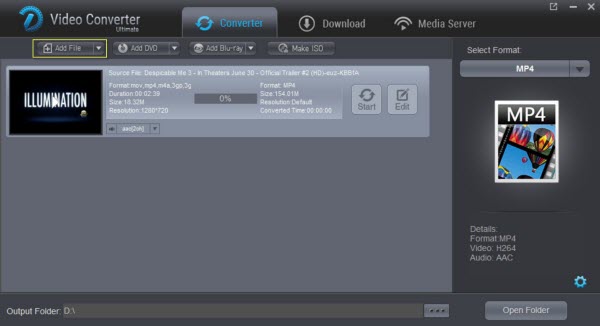 Step 2. Select MP4 as the output format Open the "Select Format" list of this app on the right side of the main interface, and then select "MP4" under the "Format > Video" section. If you are planning to play the converted MP4 files on iPhone, iPad, iPod, PSP, BlackBerry, HTC, VR, Xbox, TV or other popular devices, you can choose the presets offered so that there is no need to set the resolution, frame rate etc. by yourself. Just go to "Phone", "TV", "Games", "VR" category to select the corresponding the devices here. Step 3. Video editing (optional)Besides the conversion function, this MP4 video converter actually supplies some useful edit functions to improve your videos by cropping, trimming, flipping, adding effects/watermark, create 3D for the video.
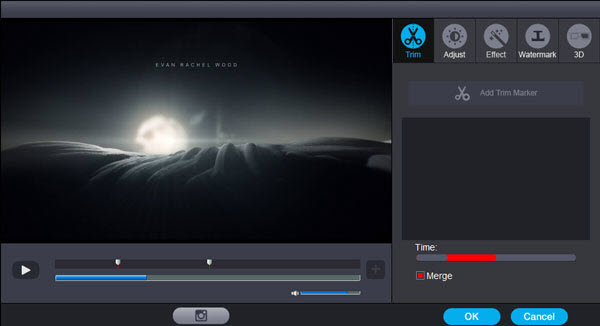 Step 3. Start to Convert MKVCinemas downloaded video to MP4 Hit the "Start" button. A couple of minutes later you will get quality MP4 file(s). The entire process will take a bit of time, obviously vary depending on the size of the MKV flash files and your computer hardware specs. The Video Converter (Windows 10 supported) works well in Windows 10/8/7/XP/Vista. Have a nice media experience. Now you can connect your iPod/iPhone, Android, VLC, VR, TV or other portable media player you own with PC, and transfer these MP4 files to it. You know most portable media player accepts MP4 format, such as iPod, iPhone, Walkman, PSP, Zune, Creative Zen, etc. Now, it's time to enjoy your MKVCinemas downloaded video on your portable media player in the living room, on a trip, or anywhere. Other Two ways to convert MKV to MP4a. Converting with VLC (Windows/MacOS) VLC media player can recognize and play almost any video format, including MKV, and it's absolutely free. Not only can you watch MKV files with VLC, but it can also convert your video into a number of formats, including MP4. Here's how. Step 1: Navigate to VideoLAN's homepage and download VLC. Make sure to read the fine print when installing, so you aren't introducing your computer to any hidden programs or viruses. Afterward, launch the program as you would any other piece of software Step 2: Click the Media tab in the upper-left corner and select Convert/Save from the resulting drop-down menu. From here, click the Add button and locate the file you wish to convert on your PC. Once found, hit the Convert/Save button at the bottom of the window. Step 3: Specify your desired video format — in this case, "H.264 + Mp3 (MP4)" –using the drop-down menu beside Profile. Clicking the tool icon will also allow you to further fine-tune your settings. Once you're happy with your settings, specify under Destination where you would like VLC to export your file. Then, click Start. The timeline will turn into a progress bar, and once it finishes, your video will be ready! b. Converting with Cloud Convert (Web-based) There are also a number of websites that allow you to convert any file type for free. We'll take you through the basics of one site in particular, called Cloud Convert. The service has been one of our go-to conversion websites for years, namely because it's simple and supports a vast array of file formats.It's important to note, however, that you have to upload your video files to a server, and the company that converts them may have access. Keep that in mind before you use it to convert anything you wouldn't want out on the open web. Step 1: Navigate to the Cloud Convert homepage and upload your file. You can either find your file through the Select file tab, or you can simply drop the file in your browser window. Step 2: Scroll through the list of audio formats and select MP4. By default, Cloud Convert will create an MP4 using an H264 video codec, and 192kbps AAC compression. If you'd rather not use these setting, click the wrench icon and customize your preferences. Once your desired settings are in place, click Start Conversion. Step 3: When the conversion process is complete, a green Download icon will pop up, which you can use to retrieve your video! Free Download or Purchase Dimo Video Converter Ultimate:
 Need the lifetime version to work on 2-4 PCs so that your friends and family can instantly broaden their entertainment options? Please refer to the family license here. Kindly Note:The price of Dimo Video Converter Ultimate for Windows is divided into 1 Year Subscription, Lifetime/Family/Business License: $43.95/Year; $45.95/lifetime license; $95.95/family license(2-4 PCs); $189.95/business pack(5-8 PCs). Get your needed one at purchase page.Related Software:BDmate (Win/Mac)Lossless backup Blu-ray to MKV with all audio and subtitle tracks; Rip Blu-ray to multi-track MP4; ConvertBlu-ray to almost all popular video/audio formats and devices; Copy Blu-ray to ISO/M2TS; Share digitized Blu-ray wirelessly.DVDmate (Win/Mac)A professional DVD ripping and editing tool with strong ability to remove DVD protection, transcode DVD to any video and audio format, and edit DVD to create personal movie.Videomate (Win/Mac)An all-around video converter software program that enables you to convert various video and audio files to formats that are supported by most multimedia devices.8K Player (Win/Mac)A mixture of free HD/4K video player, music player, Blu-ray/DVD player, video recorder and gif maker. Contact us or leave a message at Facebook if you have any issues.Related Articles:
Source: Convert MKVCinemas downloaded MKV movies to MP4
Need the lifetime version to work on 2-4 PCs so that your friends and family can instantly broaden their entertainment options? Please refer to the family license here. Kindly Note:The price of Dimo Video Converter Ultimate for Windows is divided into 1 Year Subscription, Lifetime/Family/Business License: $43.95/Year; $45.95/lifetime license; $95.95/family license(2-4 PCs); $189.95/business pack(5-8 PCs). Get your needed one at purchase page.Related Software:BDmate (Win/Mac)Lossless backup Blu-ray to MKV with all audio and subtitle tracks; Rip Blu-ray to multi-track MP4; ConvertBlu-ray to almost all popular video/audio formats and devices; Copy Blu-ray to ISO/M2TS; Share digitized Blu-ray wirelessly.DVDmate (Win/Mac)A professional DVD ripping and editing tool with strong ability to remove DVD protection, transcode DVD to any video and audio format, and edit DVD to create personal movie.Videomate (Win/Mac)An all-around video converter software program that enables you to convert various video and audio files to formats that are supported by most multimedia devices.8K Player (Win/Mac)A mixture of free HD/4K video player, music player, Blu-ray/DVD player, video recorder and gif maker. Contact us or leave a message at Facebook if you have any issues.Related Articles:
Source: Convert MKVCinemas downloaded MKV movies to MP4